Logging in procedures
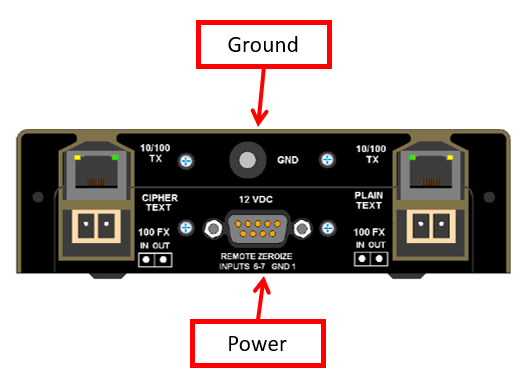
- Connect power and ground to KG175D
- Connect the low impedance Ground to the “GND” stud that is attached to the 9-Pin power cable
- Insert the power cable from the power supply into the 9-Pin connector labeled “12 VDC” and the 3-prong NEMA cable into a 120v 60Hz receptacle
-
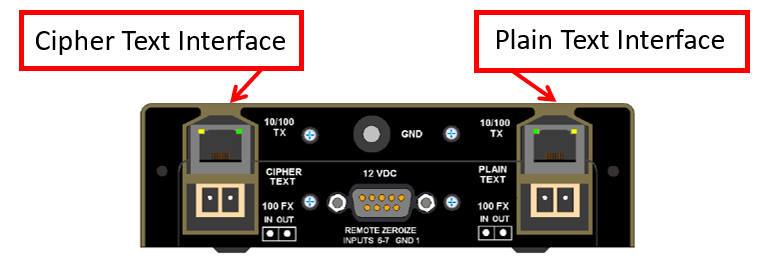
Connect CT and PT cables
- Connect CAT5e copper cable into the RJ45 port “TX 10/100” or a multimode fiber optic cable into the LC port labeled “100 FX”
- One cable for Cipher (CT-Black DISN) the other for Plain Text (PT-Red-SIPRNet)
noteCAT5e and MM fiber optic cables can be used in any combination
-
Connect laptop to console port
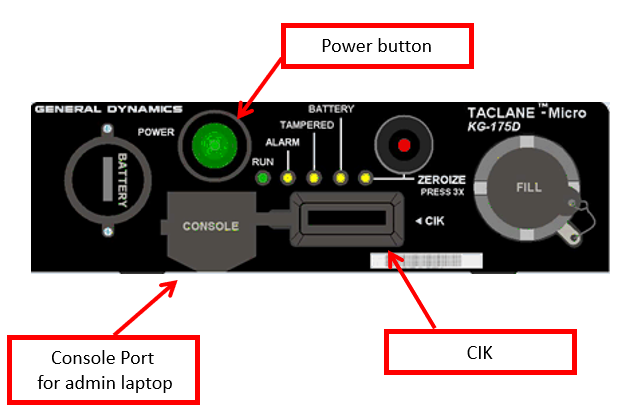
- Connect a CAT5e straight through patch cable from your laptop computer to the RJ45 console port on the front of the Taclane
- Remove plastic CIK port protector and then insert Master CIK into the front of the Taclane
- Press the power button to start the KG175D
noteIt can take up to 4 mins for startup
- HUMAN MACHINE INTERFACE (HMI)
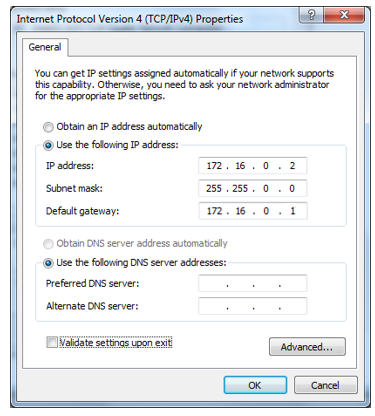
- Within the admin laptop, launch Internet Protocol (TCP/IP) Properties
- Set the laptop IP address:
172.16.0.2 - Set the Subnet mask:
255.255.255.0 - Set the Default gateway:
172.16.0.1
- Set the laptop IP address:
- Within the admin laptop, launch Internet Protocol (TCP/IP) Properties
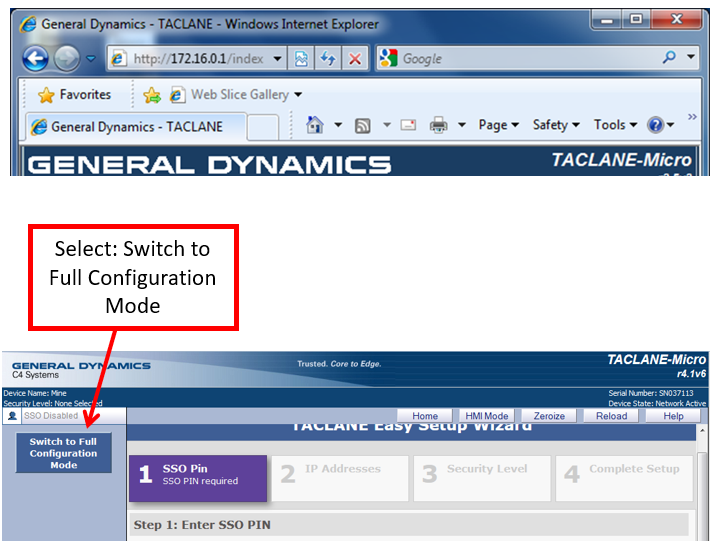
- Display HMI and change to full configuration mode
- Browse to http://172.16.0.1
- Taclane will launch the Easy Setup Wizard
- Select:
[Switch to Full Configuration Mode]