Configuring the KG175D Taclane
-
Configure SSO Privilege
- Select: SSO Disabled
- Enter the default PIN
123456789and Submit PIN? [YES] - Confirm SSO Enabled is now present
- Enter the default PIN
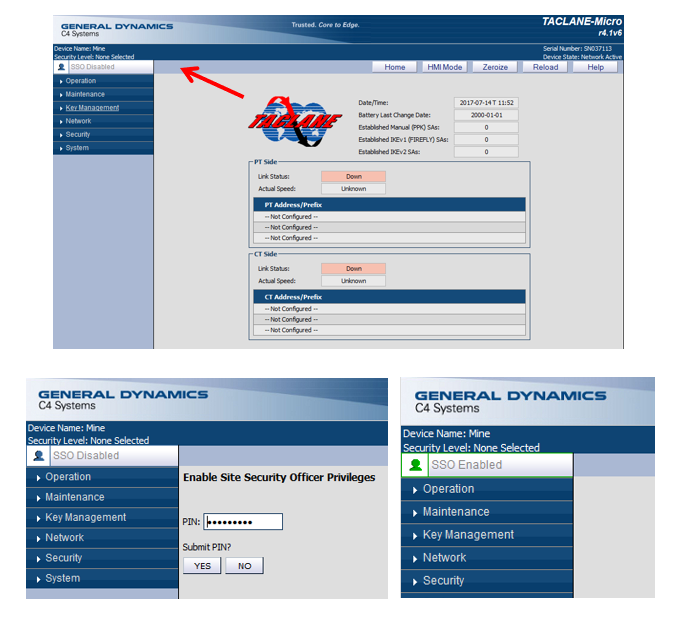
- Select: SSO Disabled
-
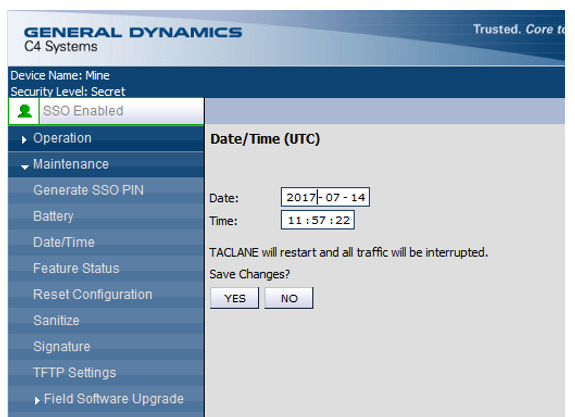
Set date and time
- Navigate to
Maintenance > Date/Time - Date:
YYYY – MM – DD - Time:
HH : MM : SS - Save Changes? [YES]
noteSet to UTC
- Navigate to
-
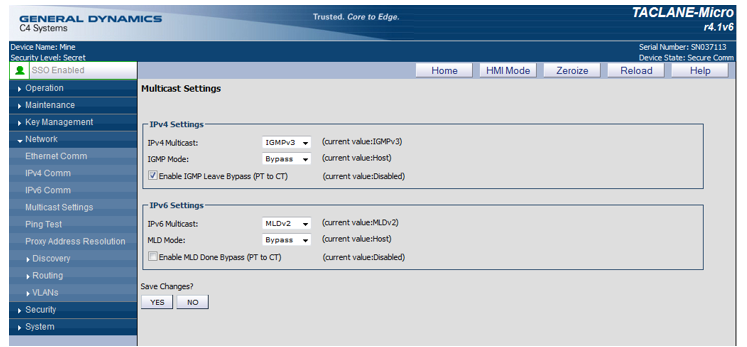
Set Multicast
- Navigate to
Network > Multicast Settings - Under IPv4 Settings
- Select:
IGMPv3 - Select:
Bypass - Check:
Enable IGMP Leave Bypass (PT to CT)
- Navigate to
-
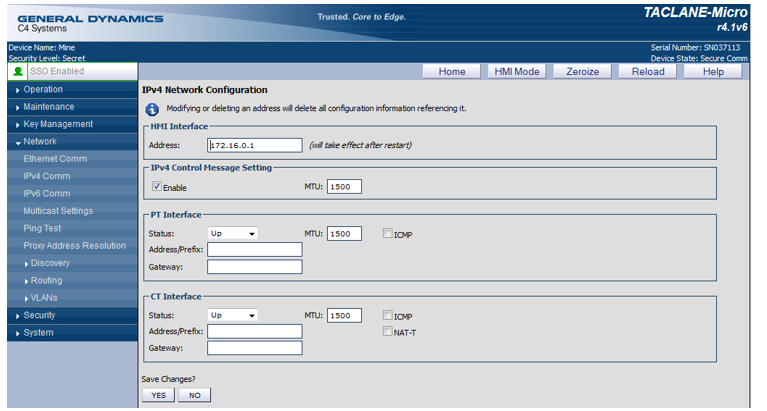
Enter the IPS and enable ICMP
- Navigate to
Network > IPv4 Comm - Leave HMI Interface as
172.16.0.1 - IPv4 Control Message setting: Check Enabled
- Enter the established IPs for PT and CT interfaces
- Set MTU:
1500 - Ensure both ICMP checkboxes are selected (network troubleshooting)
- Deselect:
NAT-T
- Navigate to
-
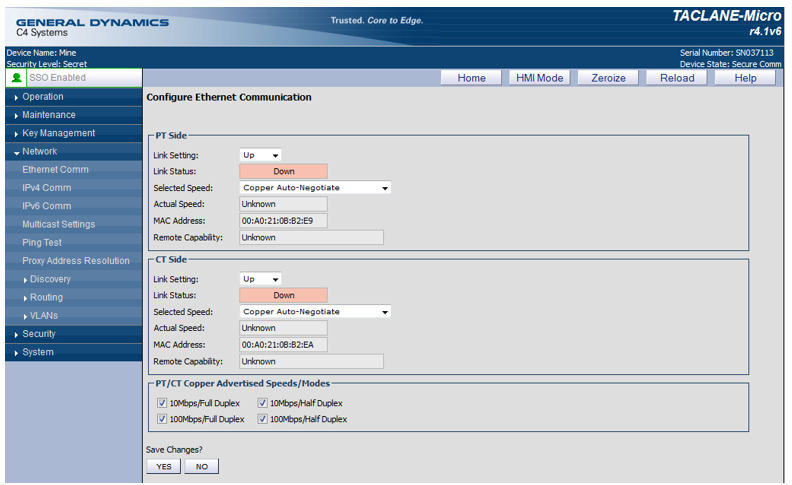
Verify ethernet connection
- Navigate to
Network > Ethernet Comm - Control Link Status: Up or Down from this page
- Selected Speed: According to cabling used
- Save Changes? [YES]
- Navigate to
-
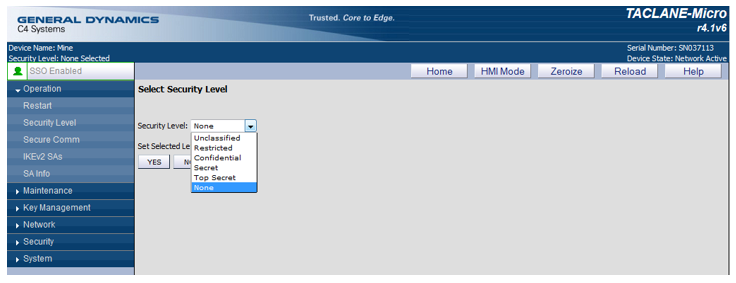
Set security classification level
- Select: the appropriate classification level
Secretfor SIPRNet,Top Secretfor JWICS- Set Selected Level: [YES]
noteIf you select the classification level other than that the keys were generated/loaded it will not pass or encrypt traffic
-
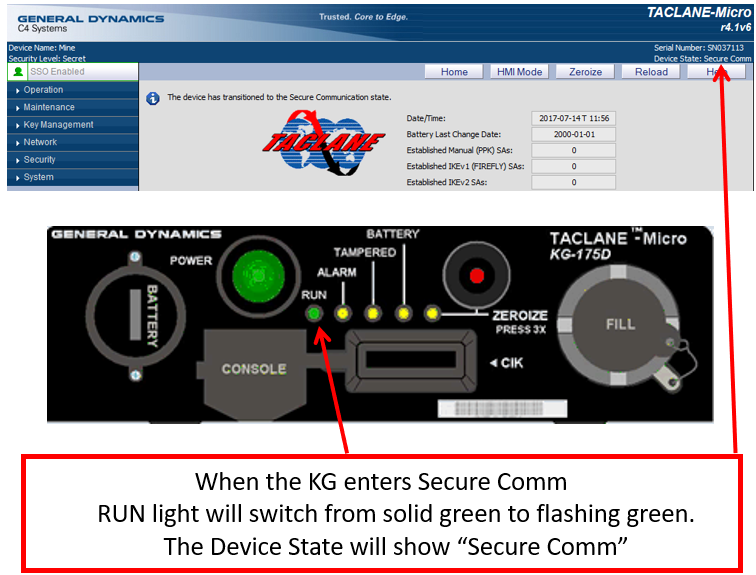
Select secure communication mode
- Navigate to
Operation > Secure Comm - Enter Secure Comm? [YES]
- Confirm Device State:
Secure Comm
- Navigate to
-
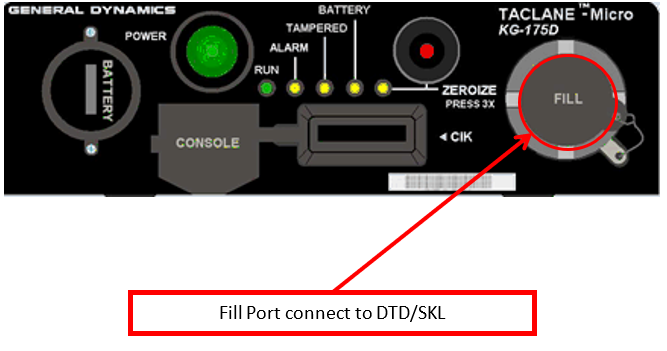
Fill firefly vector set key
- Connect DTD/SKL to the KG175D
- Power on Key Loader
Appl > Fill > Utility > Setup > Protocol > DS101 > Provide Bus Wakeup > YES- No input is required on the KG175D during key fill
- Session will last up to 5 minutes
noteAny partially transferred keys will be deleted after the session has completed
Keys must be transferred before creating key chains
-
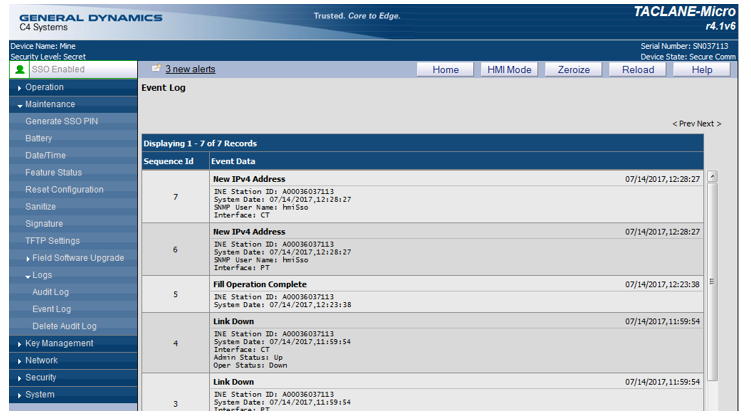
Verify key fill - Even log
Navigate to Maintenance > Logs > Event Logs
-
Unassigned pre-placed keys (PPK)
- Navigate to
Key Management > Pre-Placed Keys - Unassigned Keys will appear under Short Title
- Select: Paper/pencil icon Edit to create a new PPK Chain
noteNotice: If you are loading a new edition of the key, DO NOT DELETE the existing keychain. This will remove all SAs and Rules associated with the keychain. Follow the procedures to append to the end of the chain.
-30882f8ddd086e371a6d9e4082b76cab.png#center)
- Navigate to
-
Create PPK chain
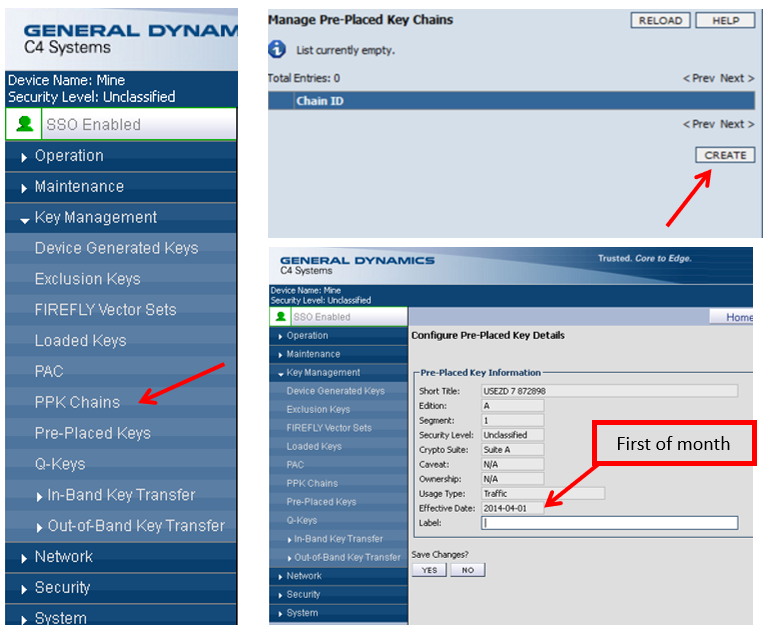
- Navigate to
Key Management > PPK Chains - Select: [Create]
- Navigate to
-
Set local enclave route
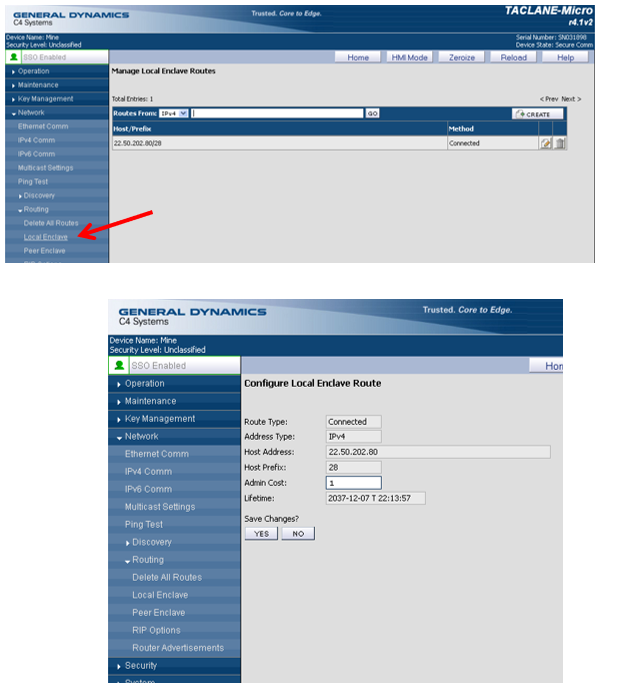
- Navigate to
Network > Routing > Local Enclave - Select: [Create]
- Address Type:
IPv4 - Host Address: Red Side IP address
- Host Prefix: CIDR for Red Side IP Address
- Admin Cost:
1 - Lifetime:
YYYY-MM-DD T HH:MM:SS
noteThat the mission ends and route will expire
- Navigate to
-
Create static routes
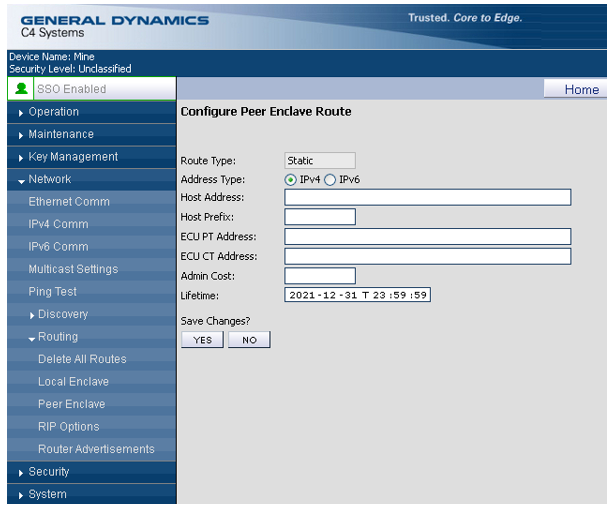
- Navigate to
Network > Routing > Peer Enclave - Select: [Create]
- Route Type:
Static - Address Type:
IPv4 - Host Address:
0.0.0.0 - Host Prefix:
0 - ECU PT Address: Far End Taclane PT Address
- ECU CT Address: Far End Taclane CT Address
- Admin Cost:
1 - Lifetime:
YYYY-MM-DD T HH:MM:SS - Select: [YES]
noteThat the mission ends and route will expire
- Navigate to